
How to Prepare an Excavator for Transport: 7-Step Guide
Table of Contents
Last Updated: October 18, 2026
Step 1: Inspect the Excavator and Trailer Before You Start
A proper excavator transport plan begins with a walk-around inspection of both the machine and the trailer. A cracked ramp pin or leaking hydraulic hose found in the yard is a minor delay; found at highway speed, it is a serious incident.
Pre-Transport Equipment and Trailer Inspection
Walk the machine first: check for hydraulic leaks, loose pins, worn tracks, and anything hanging that could catch during loading. Then inspect the trailer separately, ramps, deck condition, tie-down points, lights, and tire pressure. A common mistake is inspecting the excavator and ignoring the trailer, but the trailer carries the load.
Check hydraulic hoses and cylinders for leaks
Inspect track tension and tread wear
Confirm all lights and brakes work on the trailer
Cleaning Mud and Debris from the Undercarriage
Mud and debris add hidden weight and create a slipping hazard on the ramps. Pressure-wash the undercarriage and tracks before loading: clean tracks grip better, and you avoid dropping mud onto the highway, a safety and road regulation concern.
Pro Tip Clean tracks also let you spot damage you would otherwise miss. A cracked track link hides under packed clay until you wash it off.
Step 2: Confirm Excavator Transport Dimensions and Weight
You cannot choose a trailer or plan a route until you know exactly what you are moving. Measure the machine's overall dimensions and confirm its operating weight, then add any attachments riding along. These excavator transport dimensions and weight figures drive every decision that follows.
Checking Machine and Trailer Weight Capacity
The trailer's rated capacity must exceed the combined weight of the excavator, attachments, and any fuel or debris on board. Load balance matters too: too much weight on the tongue or rear axle makes the trailer unstable. Keep the machine centered over the trailer axles and confirm the loaded weight stays within the trailer's gross vehicle weight rating.
Check | What to Confirm | Why It Matters |
Machine weight | Operating weight plus attachments | Prevents overloading the trailer |
Trailer capacity | GVWR above loaded weight | Keeps axles legal and stable |
Overall dimensions | Length, width, height | Sets permit and route needs |
Load balance | Weight centered over axles | Stops sway and tongue overload |
Step 3: Choose a Suitable Trailer or Lowboy
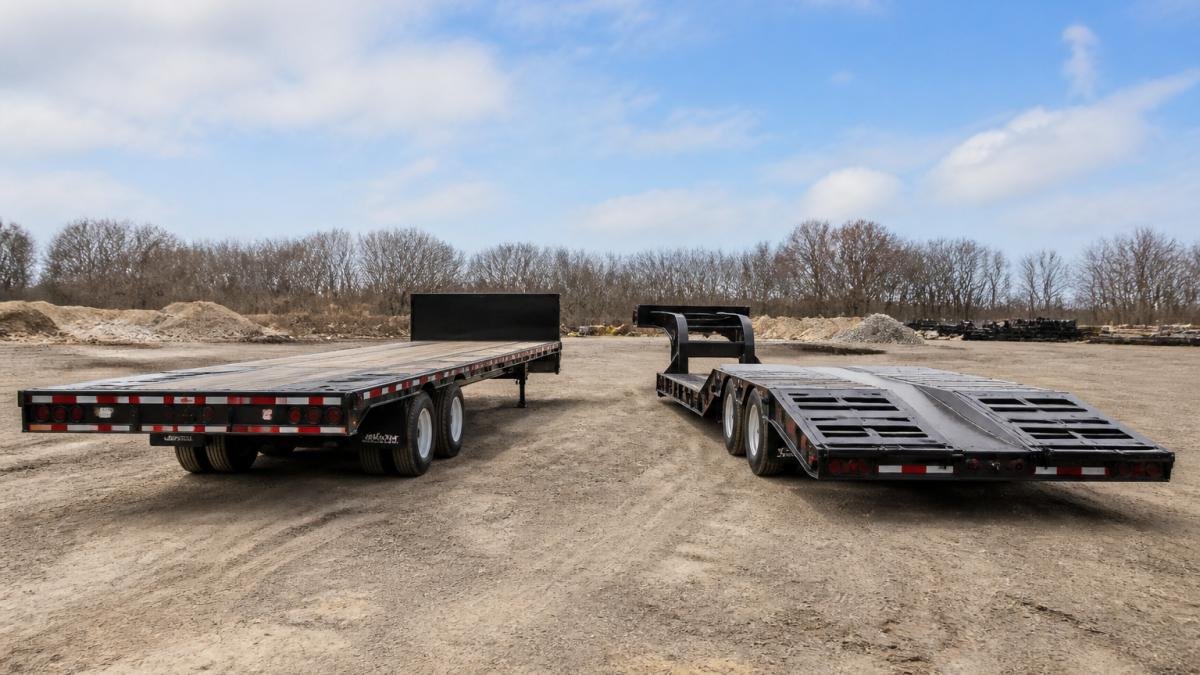
The right trailer depends on the machine's size and your route. A compact excavator fits a standard flat deck; a larger machine needs a lowboy or float to keep transport height legal and weight spread across more axles.
ENGINEERING EYE
Flat deck: best for mini and compact excavators
Lowboy or float: best for full-size machines and heavier loads
Deck length: must cover the machine plus attachments
If you would rather not own or maintain a trailer for an occasional move, a flat deck or float service handles the haul for you. This is the kind of oversized equipment transport J&M Disposal Inc. provides for construction and farm machinery.
Step 4: Learn How to Load an Excavator on a Trailer
Loading is where most incidents happen. Knowing how to load an excavator on a trailer safely comes down to alignment, patience, and a spotter. Never rush this step.

Positioning and Aligning the Excavator with Loading Ramps
Set the trailer on level ground and chock the wheels. Lower the ramps and confirm they sit flat and locked. Line the machine up square with the ramps before you move an inch, with a spotter guiding the operator by hand signal.
Centering Tracks on Ramps and Trailer Deck
Drive up slowly and keep both tracks centered on the ramps. Uneven tracking is how machines slide off. Once on the deck, center the tracks between the sides and position the machine so its weight sits over the axles. Set the parking brake and lower the bucket to the deck.
Watch Out Loading on a slope or soft ground is how rollovers happen. If the ground is uneven or soft, move to firm, level footing before you start. The few minutes you save are not worth a tipped machine.
Step 5: Know How to Secure an Excavator for Transport
A machine that shifts on the deck at highway speed is not just a cargo problem, it is a steering and braking problem for everyone around it. The goal is a load that cannot move forward, backward, sideways, or upward, and stays that way for the whole trip.
Tie-Down Calculations and Inspection Criteria
Start with the numbers, not the chains. Most provincial commercial vehicle safety guidance requires the aggregate working load limit (WLL) of your securement system to be at least half the load's weight, and many carriers target a combined WLL equal to or greater than the machine's weight for margin.
Worked example: a 5,500 kg excavator with a 400 kg bucket and thumb needs an aggregate WLL of at least 2,950 kg under the half-weight baseline, and closer to 5,900 kg if you follow the full-weight practice.
Chain and binder selection: grade 70 transport chain is the common choice for equipment; grade 43 is lighter-duty and not appropriate for a full-size machine. Use load binders matched to the chain size, and confirm the binder's WLL, not just the chain's.
Attachment restraint: a bucket, thumb, or breaker that can swing or drop needs its own restraint or must be lowered and pinned so it cannot move independently of the machine.
Anchor points: attach to the machine's frame or designated tie-down points and to the trailer's rated anchor points, never to hoses, sheet metal, or the bucket teeth.
Watch Out A tie-down that is tight at the yard can go slack within the first few kilometers as the suspension settles and the load shifts. Plan a re-check stop after the first stretch of driving, and again after any significant temperature change.
Positioning and Load Balance on the Deck
Securement only works if the load is placed correctly. Center the machine over the trailer axles, balance weight left to right, and keep tongue weight within the tow vehicle's rating, too far forward overloads the tongue, too far back and the trailer can sway. Then set the parking brake, lower the bucket to the deck, and attach tie-downs in a cross pattern so the load is restrained in every direction, not just pulled downward.
Use four tie-downs at minimum, one per corner, in a crossed pattern
Attach to the frame or designated points, not to hoses or sheet metal
Confirm binders are locked and chains are tight before pulling out
Step 6: Position the Boom, Arm, Bucket, and Attachments for Travel
Fold the machine down for travel: lower the boom, tuck the arm in, and curl the bucket close. This keeps transport height and length within legal limits and stops the arm from swinging. Remove or fold attachments that add width or height, and secure loose items separately.
Lower the boom fully
Curl the bucket tight to the machine
Fold or remove attachments that add height
Step 7: Complete Pre-Trip Legal and Dimensional Checks
Before you pull out, confirm the load is legal for every jurisdiction on the route, not just the one you start in. Weight and dimension limits are set provincially, and a load legal at origin can be over-height or over-weight a few kilometers down the road.
Gross and Axle Weight Checks
Know three numbers before you leave: the machine's operating weight plus attachments, the trailer's gross vehicle weight rating (GVWR), and the tow vehicle's gross combination weight rating (GCWR). The loaded combination must stay under the lowest applicable rating, with no single axle overloaded. Scale the loaded rig at a certified scale before a long haul, the only way to confirm axle weights rather than estimate them.
Confirm loaded weight is under trailer GVWR and tow vehicle GCWR
Confirm steer, drive, and trailer axle weights are within their ratings
Confirm tongue weight is within the tow vehicle's rating
Overall Dimensions, Permits, and Flags
Measure the loaded height, width, and length, not the machine alone. Height runs from the ground to the highest point, which may be the boom, cab, or an attachment; width is measured at the widest point, including tracks or attachments. Compare those figures against the limits for each province on the route and arrange oversize permits where required. Many jurisdictions require flags, lights, or signage on over-width loads, and some require pilot vehicles above certain thresholds.
Measure loaded height, width, and length at the widest and highest points
Compare against provincial limits for every jurisdiction on the route
Arrange oversize or overweight permits before departure
Route and Site Risk Assessment
Plan the route around the load, not the other way around. Note low bridges, overhead wires, tight turns, construction zones, and soft shoulders near the destination, and check that the job site has firm, level ground for unloading and room to turn the trailer.
According to Transport Canada's guidance on vehicle weights and dimensions, provinces set their own weight and dimension limits, so confirm the rules for every jurisdiction your route crosses. For securement standards, provincial commercial vehicle safety guidance outlines accepted tie-down practices. When in doubt about permits, your provincial ministry of transportation is the source to check before you move.
Pro Tip Photograph the loaded machine from all four sides and keep the images with the trip paperwork. If a roadside inspection questions your dimensions or securement, a dated photo set is the fastest way to show the load left the yard legal.
Mini Excavator Transport Checklist
Use this mini excavator transport checklist as a final walk-around before every haul so nothing gets skipped.
Inspect machine and trailer; fix faults first
Clean mud and debris from tracks and undercarriage
Confirm machine weight and overall dimensions
Different configurations, from a compact mini to a full-size machine with a thumb or breaker, each change the weight, height, and securement plan. Build the checklist around your specific machine, and verify the load after the first few kilometers.
Moving an excavator safely takes preparation, the right trailer, and a secure load, and skipping any step puts people and equipment at risk. If you would rather leave the hauling to a local team, J&M Disposal Inc. offers flat deck and float services for oversized construction and farm equipment, backed by our range of roll-off bins for the debris that comes with the job.
Frequently Asked Questions
Should an excavator bucket be removed for transport?
In most cases, you do not need to remove the bucket, but you must position it correctly. Curl the bucket close to the machine and lower the boom so the bucket sits just above the trailer deck. This keeps the load compact and lowers the overall transport height. Removing the bucket is only necessary when the machine exceeds height or width limits, or when the trailer deck is too short to balance the load. Always measure the full assembly before deciding.
What permits or route checks may be needed to transport an excavator?
Permits depend on the combined width, height, length, and weight of the truck, trailer, and excavator. In many jurisdictions, loads wider than 2.6 metres or heavier than standard axle limits require an oversize permit. Check overhead clearance on your route, avoid low bridges and power lines, and confirm weight restrictions on local roads. Requirements vary by province and municipality, so contact the relevant transportation authority before you move. J&M Disposal Inc. can help with flat deck and float transport logistics.
How do you transport a mini excavator safely?
A mini excavator follows the same steps as a full-size machine but with lighter equipment. Use a trailer rated for the machine's weight plus attachments, align the ramps squarely, and load slowly in low gear. Lower the bucket, shut off the engine, and set the controls to neutral. Use four tie-down points at the corners of the undercarriage and check chains after the first few kilometres. Because mini excavators are lighter, they can shift more easily on rough roads, so recheck securement at every stop.
Do excavators tip over easily during loading?
Excavators are stable on flat ground but can tip during loading if the ramp angle is too steep, the ramps are misaligned, or the machine is driven up at an angle. Keep the bucket low, drive straight up the centre of the ramps, and avoid turning on the incline. Use ramps with a gentle slope and a non-slip surface. If the ramp shifts or the tracks start to slide, stop and reset rather than correcting mid-climb. A spotter guiding the operator reduces the risk significantly.
Comments